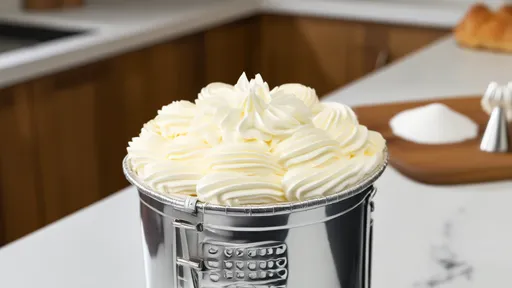
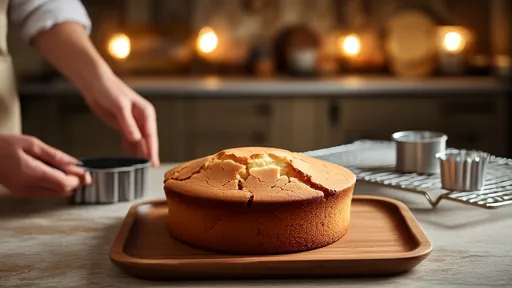
There is a particular heartbreak that comes with pulling a beautiful, golden-brown chiffon cake from the oven, watching it rise to perfection, only to witness its tragic collapse moments later. The high, airy structure deflates into a dense, sad shadow of its former self. For many home bakers, this is a familiar and frustrating scene. The secret to avoiding this culinary tragedy lies not in the mixing of the batter, but in the critical moments immediately after baking and the patient hours that follow. The triumvirate of techniques—rapping the pan, inverting it to cool, and waiting for it to cool completely—is the unshakeable foundation of a stable, majestic chiffon cake.
The science behind a chiffon cake’s rise is a delicate ballet of air, heat, and structure. Unlike butter cakes that rely on creaming butter and sugar for leavening, or sponge cakes that use whipped whole eggs, the chiffon cake is a unique hybrid. It uses whipped egg whites to incorporate a massive amount of air, while oil keeps it incredibly moist. This creates a fantastically light and tender crumb. However, this very tenderness is its Achilles' heel. The network of protein from the egg whites and the starch from the flour is set by the heat of the oven, but it is still incredibly fragile and malleable when hot. Gravity is the enemy of this delicate matrix. If left to cool right-side up, the weight of the cake itself will press down on the warm, soft structure, squeezing out the precious air pockets and causing the entire masterpiece to sink. This is why the immediate post-oven procedure is not a suggestion; it is a mandatory rescue mission.
The first and most dramatic step in this rescue is the sharp rap of the pan against the countertop the moment it emerges from the oven. This action serves a vital purpose. During baking, steam becomes trapped within the complex web of the cake’s crumb. As the cake cools, that steam will condense back into water. If left trapped, this moisture can make the bottom of the cake soggy and weak, contributing to collapse. By giving the pan a firm tap, you are shocking the structure. This helps release any large pockets of steam that might be lurking, preventing them from becoming destructive moisture bombs later. It’s a quick, decisive action that sets the stage for stability. Think of it as a wake-up call to the cake’s internal architecture, telling it to firm up and let go of what it doesn’t need.
Without a moment’s hesitation, the next step must be executed: inverting the pan. This is the single most important factor in preventing collapse. By turning the cake upside down, you are using gravity to your advantage. Instead of the cake sinking into itself, you are allowing it to stretch *downwards*, suspended in its pan. This counterintuitive act supports the entire weight of the cake. The edges of the pan and, most crucially, the central tube (if using a tube pan) act as a scaffold. The cake cools and sets in this stretched, suspended state. This process effectively "locks in" the airy structure achieved in the oven. The protein networks solidify while being held taut, resulting in a final product that is tall, even, and light as a cloud. For pans without feet, suspending the inverted pan over the neck of a bottle or resting it on four cups is essential to allow for air circulation and prevent the top (now the bottom) from getting moist and sticky.
Then begins the true test of a baker’s patience: the complete cooling. This is where many fall victim to temptation. The aroma is intoxicating, the desire to see the final product is overwhelming, but succumbing to this urge is a guarantee of failure. A cake that is even slightly warm is still soft and vulnerable. Attempting to run a knife around the edges and push it out of the pan will inevitably lead to tearing, breaking, and partial collapsing. The cake must be allowed to cool to room temperature entirely while still inverted. This could take a good two hours or more. During this time, the structure finishes setting and firming up. The crumb becomes resilient enough to handle the final, nervous moment of unmolding. Rushing this process is akin to removing the support beams from a building before the concrete has fully cured; the results are predictably disastrous.
Only after the pan feels completely cool to the touch should you proceed to unmold. This final act requires a gentle touch. First, carefully run a long, thin offset spatula or a flexible knife around the outer edge of the cake, ensuring you press against the pan to avoid cutting into the cake itself. If your pan has a removable bottom, gently push it up. For tube pans, also loosen the cake from the central tube. The goal is to break the seal between the cake and the pan without damaging the tender crumb. A final, gentle tap should release the cake onto a serving plate, revealing a perfectly baked masterpiece with a flat top and an uncompromised height.
Mastering the chiffon cake is a lesson in discipline and respect for the process. The baking is only half the battle. The real magic happens in the counter-intuitive flip and the agonizing wait. Embracing the ritual of rapping, inverting, and waiting is what transforms a good baker into a great one. It is the unwavering commitment to these final steps that ensures your chiffon cake will always stand tall, a proud and airy testament to your patience and skill.

By /Aug 20, 2025
By /Aug 20, 2025
By /Aug 20, 2025
By /Aug 20, 2025
By /Aug 20, 2025

By /Aug 20, 2025
By /Aug 20, 2025
By /Aug 20, 2025
By /Aug 20, 2025

By /Aug 20, 2025
By /Aug 20, 2025

By /Aug 20, 2025
By /Aug 20, 2025
By /Aug 20, 2025
By /Aug 20, 2025

By /Aug 20, 2025
By /Aug 20, 2025
By /Aug 20, 2025

By /Aug 20, 2025

By /Aug 20, 2025